Showing posts with label Tutorial. Show all posts

Wednesday, March 1, 2017

Avoid the Chiropractor with these Fancy Knitting Maneuvers

Are you sacrificing your physical health to crank out knits? Are you tired, sore, or just plain struggling? Do not fear!

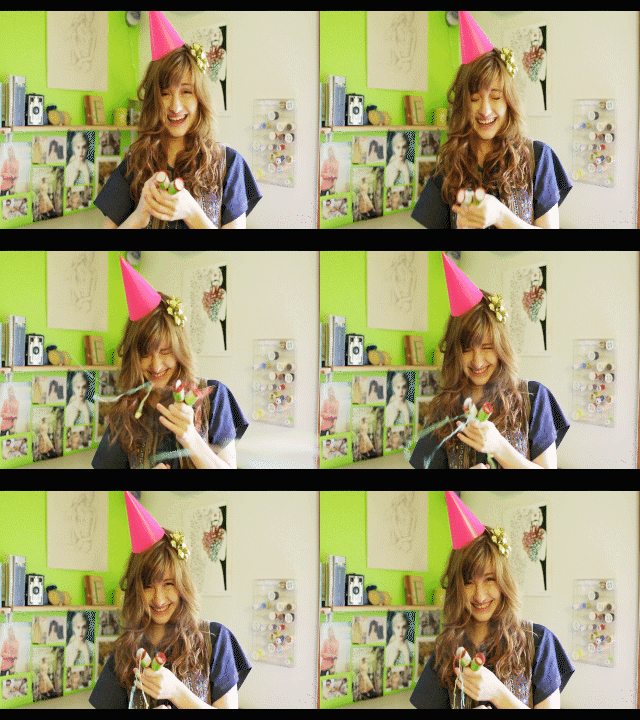
These five, fancy maneuvers will spare your shoulders a trip to the chiropractor, and will basically make you the coolest cat on the block—which brings me to the first maneuver. My personal favorite, The Cool Cat. This diddy was taught to me by my mentor, Sachi. You need to doo daaaaa CAT! Much like a feline, the goal here is to be as cuddly as possible with that post. Really dig your shoulders in there.
The next pose is a classic. It keeps you from slumping and tensing up. It keeps you balanced and upright, is very good for posture—and it brings you back to a simpler time with a peaceful mind. I’m talking about The Monkey!
If your posture doesn’t improve, don’t sweat it. The monkey isn’t for everyone. You might just be in need of something more dynamic, something more powerful and concentrated. You might be one of the rare few who practice the sacred art of The Power Stance. The Power Stance is an ancient technique passed down to us from the greats. Are you willing to carry on its legacy?
Those are the three major maneuvers passed down by my mentor, Sachi, and adapted for my comfort. Feel free to mix them up, match them, altar them and invent your own—but before you go grab your needles, wait. There are two more maneuvers, exercises designed to recover those muscles and build up strength.


Surprise the Tiger is a necessity, an absolute must for any knitter’s arsenal. Begin by squeezing your hands together tightly. Then stretch them out as wide as you can. Imagine you’re in a great forest, and among the shades of green you see orange and white stripes peaking out behind a tree. Surprise the Tiger! Stretch those tired tendons.
La Mallet requires a little more prepping and more technique on your part, but, you guys... mastering this technique will really help you in the long run. It’s definitely helped me. Place the mallet in your hand and lightly, ever so lightly, slowly, let your wrist hang forward and then, just as slowly, pull it back up. For best results, repeat this process 50 times every day.


Well, ladies, I wasn’t entirely truthful. There is another technique. I considered keeping it to myself, for mastering it was a grueling process. It is tiring. It is difficult and it will push you to extremes you thought not possible. But it’s so rewarding and so fun…I just couldn’t not show you. I present to you, ladies, The Worm:
This is the technique of techniques. Master this and you may consider yourself a graduate of Esther Boller’s embarrassing school for oddly satisfying knitting exercises. I hope you enjoy rubbing your backs against posts and locking in your power stances. By all means, go out, do The Worm, and surprise some friendly Tigers while you’re at it. 👩

Saturday, June 27, 2015

Good Morning Moon


All photographs are self portraits taken by myself using a tripod.
Styling and set design:  Esther Boller

The Great Gatsby will always be one of my favorite books.  Fitzgerald's books are so clearly written and there's such a high level of beauty in his words.  I've always been inspired by characters in books/movies, and as I've written before, Gatsby is an inspiration I always go back to.  There's something so whimsical and soft about the of the clothing in that era.  It feels more theatrical and special and I swoon over it all.   I've slowly been collecting pieces here and there that nod back to that era, though I can't afford the real deal.

While this dress isn't a true 1920s piece, it's a vintage Guess dress that I scored at Goodwill on 50% off day.  That was a triumphant thrift day.  I made my headband to complete my look which was very simple.  I just cut out a piece of applique from a beaded dress that I also bought at goodwill.  I always buy beaded items when I can to cut up for the beads. It's a lot cheaper and better quality of beads than buying from craft stores (always wait for the 50% off days though).  Once my shape was cut, I then ironed a piece of heavy fusible interfacing onto the back.  This makes the applique super firm.  Then I stitched a piece of ribbon onto the back and magic - we're in the 20s.  


Headband:  DIY,  Dress:  Vintage Guess,  Shoes:  JC Penny,  Necklace:  H&M sale.  
Stay magical.  

Xx
Esther 

Friday, October 31, 2014

Outfit: By the Water

All photographs are self portraits taken by myself.  

My favorite season is fall!  I love the sound of leaves crinkling beneath my feet, the smell of bonfires, and most of all the chilly wind hitting my face.  There's something comforting about wearing big sweaters and chunky socks.  I don't get much - well any of that - in Savannah really, but lately it's been about 70 degrees which is chilly enough (yes northerners laugh) to at least wear jackets which I've been pretty happy about! 


Outfit:  
Jacket:  Sheinside
Top:  Forever 21
Skirt:  Thrifted

I've recently had a lot of people ask me about how I take my self portraits.  I wrote a post about this a couple of years ago and I thought that I'd share it again.  It's easy for posts to get buried in a blog so here's a link back to that post.

Here are the 4 big tips to take away about self portraits.

1.  Think of the background.  What's going on behind you?  Is it interesting?  Is it distracting?  I try to move my camera around and look through the view finder to get all the angles that I can, before I take the time to focus with the camera my tripod.  This saves a lot of time adjusting the focus later

2.  Double check that you're in focus.  I've had so many photos that I think are in focus, but once I zoom in I realize that it's completely blurry!  It's a very sad moment when you think you've got your shot and then you find out it's blurry.  So take one test photo, then walk back and zoom in on that photo to make sure that it's actually in focus.

3.  Find a place where you don't feel self conscious.  This can be really hard when first starting out - especially if one lives in a city.  If you're not able to find that, and you're in a busy park with people staring -remind yourself that chances are you're not going to see these people again, and just keep shooting.  That usually helps me when I feel awkward taking a photo.  It took years before that thought helped me though, so it's ok if you still need to go to a more hidden place while starting out.

4.  And this is the most important take away - just start shooting!  Take as many photos as possible.  I think that one of the biggest holdups in self portrait taking (and photography in general) is the fear of a photo not turning out well.  I've had countless shoots that have turned out bad.  In fact, I had a shoot a couple of weeks ago turn out bad.   I decided to re-shoot it in a different location and the new shoot turned out so much better. And remember - you get to choose which photos to share with the world.  If you don't like it, don't share it.  Delete it.  But please don't stop taking photos if your first try turns out less than you envisioned it.

Once you start taking photos you'll realize what tricks work best for you.  If you have any more specific questions feel free to leave it in a comment, and I'll be happy to try to answer it!  And for all of you self portrait pros out there, do you have any tips to add?  I'd love to hear your advice as well!

Sunday, October 5, 2014

Tutorial: Vintage Inspired Fur Wrap

Here it finally is - the fur wrap tutorial!  Fur lapels are really fun, whimsical pieces to add to a jacket or coat and is perfect for this fall season.  This tutorial is a fairly simple and quick project to make.  Below are the steps showing how to make your own!
Materials:
3/4 yard of fur (faux or real, whichever is your preference)
Lining (roughly around the same color as fur)

Step 1.  Cut out your pattern piece.  This will take some experimenting and problem solving depending on the length and width that you want your wrap to be.  I based mine off of the shape of blazer lapel.  Make a few tests from scrap fabric or muslin until you get the shape that you want.

 Your pattern should look roughly like the shape of the below photo.  Remember to add 1/2 inch for your seam allowance on all sides.

Step 2.  Once your paper pattern is cut, place it on the wrong side of your fabric and only cut one piece at a time.  Take a marker and trace around your pattern directly onto the fabric.  It's ok to use a marker for this, because it's not going to be seen.

Side note:  Ignore the lines on the below pattern paper.  I was using old paper that had already been marked on.
Step 3.  Carefully cut the pattern out using the very tips of your scissors.  When cutting fur you want to use the tips so that it doesn't cut the fur short.    This part can go relatively slow, but you want to make sure that you're cutting as little amount of fur as possible.  We're not giving it a hair cut at this point!  Another method is to take a sharp razor/exacto knife and cut into the pattern. This way of cutting is quicker, but make sure that you're still carefully following your marker line.

Once the first piece is cut out flip your pattern over and cut a second piece.  Cut the two lining pieces as well.
Step 4.  Once the fabric is cut out, pin the center back neck seams together.  You want to make sure that the fur is going inward when pinning.  This is because we want as much of the fur as possible to be showing on the outside so that the seam is as invisible as possible.

The easiest way to do this is to lay your pattern seams flat side by side, and then one inch at a time pinch both sides together and pin so that the fur is going inside the pinch.

Step 5.  Using a small stitch length sew the two pieces together.  Sew the two lining pieces together at this point as well.
Step 6.  After sewing, your seam should look like the below photo - all of the fur is going towards the right side of the seam.
Step 7.  Now pin the lining to the fur and sew around the whole wrap leaving a 5-6 inch opening at the top.  This is so we can turn it inside out later.  Remember to keep the fur at the seam going towards the inside all the way around.
Step 8.  After sewing cut several snips into the seams that curve.  This will allow it to lay flat.

Step 9.  Through the opening turn the wrap inside out.

Step 10.  Pin and hand sew the top opening shut using a whipstitch (link to a youtube tutorial on whip stitches).
Tada!  You now have a new fall accessory to add to any jacket!
If you make one, post a photo and share the link!  I've loved seeing all of the lovely variations of the kaftan tutorial that y'all created.  Also, if you have any questions about any of the steps feel free to add a comment, and I'll try to get to it as soon as I can!

Enjoy!

Tuesday, August 5, 2014

Announcment: The Sewing Party

I'm so thrilled to announce today a very exciting, first one-of-a-kind upcoming event called The Sewing Party!


What is The Sewing Party?  Well it's basically an online craft fair!  It's the first of its kind and will be hosted for one day.  This all day event will include:  instructional sewing/DIY classes, product demos, and connecting with other seamstresses like yourself!  How cool is that?  Here's some more detailed info from The Sewing Party:


The Sewing Party is the first ever online-all-day DIY event in history!

On November 8, 2014, thousands of DIY-ers will gather for a fun-filled day of sewing and crafting classes taught online by leading bloggers and educational experts. It’s all about Connecting. Crafting. And Creating.

Attendees will have access to more than 30 online classes available on the day of the event and for an additional 90 days. There is truly something for everyone! Classes include home décor, fashion sewing, quilting and upcycling, crafting, costume design, techniques for turning your craft into an entrepreneurial venture, and more!

Space is limited and likely to fill up fast! For just $40, “The Sewing Party” participants can attend classes; chat with participants from across the country; interact with top bloggers and educational experts who are teaching; and explore the latest crafting and sewing tips, techniques and products in our marketplace.


I'm also very excited to announce that I'm going to be one of the teachers at the event!  

My class is going to be instructing how to sew curved seams.  I'll walk you through the techniques of drafting curves into patterns, sewing, and finishing the raw, curved edges.  There are also some other really talented teachers and incredible looking classes at the event as well!  If you'd like to attend click the button below to register!
The Sewing Party
Hopefully I'll see you there! 

Tuesday, July 8, 2014

Tutorial: Kaftan Throwover

Good afternoon!  Today I'm going to share with you how to make your own kaftan throw-over.  A kaftan is such an easy garment to make, and you don't even need a lot of sewing experience to make one.  If you can sew a few inches, then this will be such a fun, short project to make!
Step 1.  
First you'll want to choose a fabric that's lightweight and has good drape.  Some awesome choices would be chiffon, silk, or a jersey knit.  Also, be sure to check out the scarf section at thrift stores!  Sometimes you can find some beautiful vintage silk scarves that are wide enough for this project.

Once you've chosen your fabric, cut it into a rectangle.  My fabric measured 38x45inches.

Step 2.
Find the center of the top edge of your fabric.  This will be your neckline.  With a piece of chalk or something you can see, mark the center.  Measure 5 inches down from the center and mark again.
Step 3.
With chalk, mark 4.5inches into the side of the top edge of the fabric.
Step 4. 
Now connect the two marks so that it makes a neckline that looks like a boat.
Step 5.
If you're using a fabric that frays easily finish the raw edges by either sewing a 1/4 inch hem, or take a cigarette lighter and burn the edges.
 or
Step 6.
Now make a new mark that is 22inches down from the top side.  Next line up the top mark (4.5in at the top) with the side mark (22inches down). 

Pin and sew a line that is 1 inch in length to connect the two pieces together.
And look at that, you're finished!
Try experimenting in different fabrics like jersey knit, or for the chillier months, try using a lightweight wool with a good drape.  Maybe add some lace or fringe trims to the bottom edges.  Experiment and make it completely your own vision!  And if you do, be sure to post photos somewhere and send the link to me.  I'd love to see what you come up with!

Thursday, January 16, 2014

DIY Tutorial: Multi-Colored Beaded Necklace

Hello everyone, I hope the start of your New Year has been everything that you've hoped so far! Today I'm posting the tutorial on how to make the Multi-Colored Beaded Necklace that I made in my previous post.  Here are the steps on how to make one yourself!

Step 1. 
Collect/find your items. This is the most fun part in my opinion.  If you've ever been a crafter you know what I mean when I say the notorious, "random bobble box."  It's that box (or boxes) where you keep all your random, pretty, things that you've found over the years and think you might use one day.  Well now's your time to go through it!  Take out whatever looks visually interesting to you.  

If you don't have a random bobble box - no worries!  Wal-Mart has an incredible $1 bead bin that has all sort of things you can use.  You can also take apart old costume jewelry, or go to the clearance jewelry section and buy a cheap necklace to deconstruct and use for parts.  For this necklace I used a plethora of random beads, old necklaces I took apart, and a few of those glass stones that are put in outside gardens.  You can use anything! 

Step 2. 
Now's your time to start laying out your pattern on a piece of felt and choose where you want your items to go.  There's no right or wrong way to do this, just play around with what looks pleasing to you.  

 Step 3:  
Once you have a basic, solid idea of what you want your necklace to look like, outline the shape with a chalk pencil.  
Step 4.  
Next start gluing down your objects using a strong fabric glue. 

 Step 5.  
Once your bead are glued down into place you can cut out your design (leave a few extra centimeters around all the edges).  Now if you'd like, you can outline your design with a row of fun colored seedbeds for a finished look. You can make as many rows as you want (I did two).

Tip:  Instead of sewing each bead one by one, I put a bunch of them onto the thread so there's already a long strand of beads.  Then I sewed that string of beads onto the edges.  This makes the process go much faster and it looks more polished than sewing each bead one by one. 

Step 6,  
Now carefully cut off the extra felt.


Step 7.
The very last thing to do is attach a ribbon or chain to the backside of the necklace.  If you already have a necklace that you took apart and it has a chain with a clasp already attached that makes it even easier for you!  I decided to use ribbon so I'll be sewing that onto the back.  If your ribbon is the kind that frays take a lighter or clear finger nail polish and go over the cut edges so it won't unravel.  


Tada!  It took some time, but you now have your very own handmade necklace!  You can makes these in variations of sizes and styles.  I think it's fun to make the design look random, but you can make it more symmetrical and organized if you like.  It's whatever comes out of your imagination now!  If you make a necklace be sure to send me the link - I'd love to see your own creation!